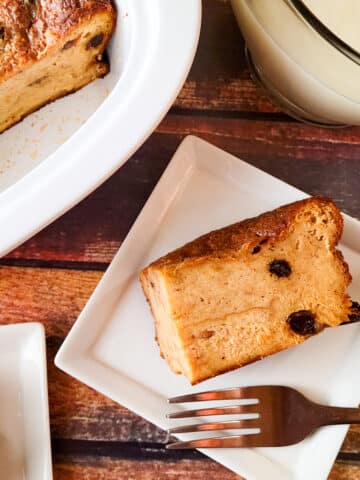
Day of the Dead Bread or “Pan de Muertos” is a delicious, light, sweet bread made to celebrate Day of the Dead or “Dia de los Muertos.” This traditional bread has strips of bread on top representing “bones.” A must make for this highly celebrated day in memory of our loved ones.

( Recipe originally posted on October 30, 2016)
Day of the Dead Bread or “Pan de Muertos” is a traditional bread made in Mexico for the celebration of “Day of the Dead.”
What is the Day of the Dead?
Day of the Dead is celebrated between Oct 31-Nov 2 in Mexico.
On these days family and friends gather together in “panteons” or cemeteries and other places to celebrate their loved ones that have passed away.
Food, drinks and music are enjoyed together.
Day of the Dead is said to date back as far as pre-Columbian days where it was celebrated for a full month.
Although for most people, death may be seen as a sad thing, for Mexicans, the Day of the Dead or “Dia de los Muertos” is a time to celebrate their lives.
This day has become a highly celebrated day by not just Mexicans or Mexican Americans but also by other cultures that also have chosen to celebrate the lives of their loved ones.
In essence, it’s a day to celebrate life and death and our ultimate destination.
What is an altar in the Day of the Dead?
Altars are built in homes and around cemeteries where offerings are placed for loved ones who have passed. Such offerings include foods that the loved ones enjoyed in life, day of the dead bread/pan de muertos, saints that are important to the family, flowers, jewelry worn, photos of their loved ones, drinks and sugar skulls just to name a few. In addition, family and friends perform various rituals, including religious ceremonies and dances.
It is believed that the deceased or the spirits of loved ones come to celebrate with the living on these days. It is truly a beautiful celebration.
Authentic Pan de Muerto
Lets talk about this delicious Day of the Dead Bread/Pan de Muerto. First what does the bread represent on the Day of the Dead?
Although the Day of the Dead Bread is made in many shapes, colors and sizes, they represent the souls of the dead.
What’s fabulous my friends is pan de muerto, is really easy to make and you only need a few ingredients.
And you know nothing is better than smelling the aroma of freshly baked bread….oh so good! There’s just something about making your own fresh bread.
And Day of the Dead Bread is so much fun to make too!
My son and I made three batches yesterday and just had a blast!

Day of the Dead Bread is a light and somewhat sweet bread. As I mentioned, normally this bread is made into several different shapes like skulls, bones and round loaves with strips of dough on top representing “bones.”
It can also be decorated with sugars, sprinkles, multi-colored sugars, food gels etc.

Day of the Dead is not only a day to celebrate and honor love ones that have passed but also a celebration of life.
So let’s get to it my friends and let me show you how easy and delicious this Day of the dead Bread really is.
For more on the Day of the Dead traditions.
Recipe and steps below ↓
📖 Recipe

Day of the Dead Bread
Ingredients
GLAZE
- 1 cup orange zested and juiced
- ½ cup sugar
RECIPE FOR ROUND LOAVES
- 5 Cups all purpose white flour sifted
- 2 packets active dry yeast
- ½ cup sugar
- ½ cup lukewarm milk
- ½ cup warm water
- 1 stick of unsalted butter
- 4 eggs beaten
- 1 teaspoon salt
- 1 zest of one orange
Instructions
- Using a grater, grate (zest) orange peel and set orange zest aside.
Making Dough
- In a saucepan over medium heat add milk, butter and water until butter melts.
- Sift 5 cups of flour into a bowl (this helps in removing the clumps from flour). Set aside.
- In a large bowl add one cup of the sifted flour, yeast, sugar and salt.
- Pour the milk mixture to the bowl of one cup of flour and mix well. Add zest of orange.
- Add eggs one at a time mixing as you go with a spoon.
- Keep mixing while you slowly add one cup at a time of flour.The dough will be sticky at first, continue until dough is smooth.
Allow Dough to Rise
- Once dough comes well together, transfer dough to a lightly floured board and knead for 10 minutes.
- Place dough in a greased bowl (spread bowl with a little bit of oil or butter).
- Cover dough with plastic wrap and allow to rise double in size. Place dough in a warm area for at least an 1 hour to 1 ½ hours.
- Now your dough is ready to form.
Forming Breads and Cooking
- Remove from bowl and place back on a lightly floured board. Flatten dough with hands and cut into 4 pieces.
- Shape 3 of the pieces into round buns.
- Use the fourth bun to form “bones.” Cut 7 strips from this bun (dough).
- You can just place strips crisscrossed on top of buns in the form of a cross or can roll dough between fingers to form “bones.”
- Use the last strip to form 3 small balls and center on top of each bread. Refer to pictures.
- Let rise for another 20 minutes. Pre-heat oven to 350. Cook loaves for 30 to 40 minutes.Note: Could make a 4th loaf if you exclude making the strips and balls.
Glaze
- While loaves are baking, prepare orange glaze. Zest the second orange and juice orange.
- Add juice, zest and sugar in a saucepan. Heat over medium heat for 2 to 4 minutes until sugar dissolves.
- When breads are done, glaze loaves with a brush.Time to enjoy this delicious bread!
Decorating Loaves
- You can also decorate your breads with colored sprinkles and sugar (while glazed bread is still warm)
- You can also add icing or confectioners sugar when bread has cooled.
Nutrition
What the dough will look after kneading.

After the dough has risen.

Shape dough into buns and lay strips on top with ball in center. Let rise again for another 30 minutes before baking.

Can also shape dough into a skull

Will you be making Day of the Dead Bread/Pan de Muerto?


Landon says
My dough never left the sticky phase :(. I kneaded it for almost 30 minutes. I sprinkled a bit more flower on the surface when kneading. Thoughts?
Cathy says
Hello Landon! Oh no! I’m so sorry to hear this! There are a couple of reasons that immediately come to mind. Did you use cold milk out of the refrigerator or cold water? If so, using very cold water or milk causes the glutens to come out of dough and will make it extra sticky. Try using lukewarm milk and warm water. I am so sorry, I now realize that this should have been reflected in the ingredients of which I have gone ahead and included, so thank you for making me aware of this. The other cause can be is that the dough needed a little more kneading. Lastly, do you live in a high humidity place? I know it may sound funny but sometimes depending on where we live can actually cause our dough to become too sticky because of all the water in the air. If so, try using a little less milk and water at first and knead dough, check for smoothness and elasticity in dough as you’re working with it and add the rest of the water and milk as needed or up to as much as the recipe calls for. Try giving these a try next time you make the recipe and hopefully together we can find the culprit to the “sticky” problem! 🙂
James says
This was great the orange glaze really complemented the bread we all loved it!!!!
Cathy says
The orange glaze is such a bonus here! So happy you all loved it!